AWS Cost Anomaly Detectionの設定方法を解説します。
AWS Cost Anomaly Detectionは、AWS利用料の異常支出を検出し通知してくれます。
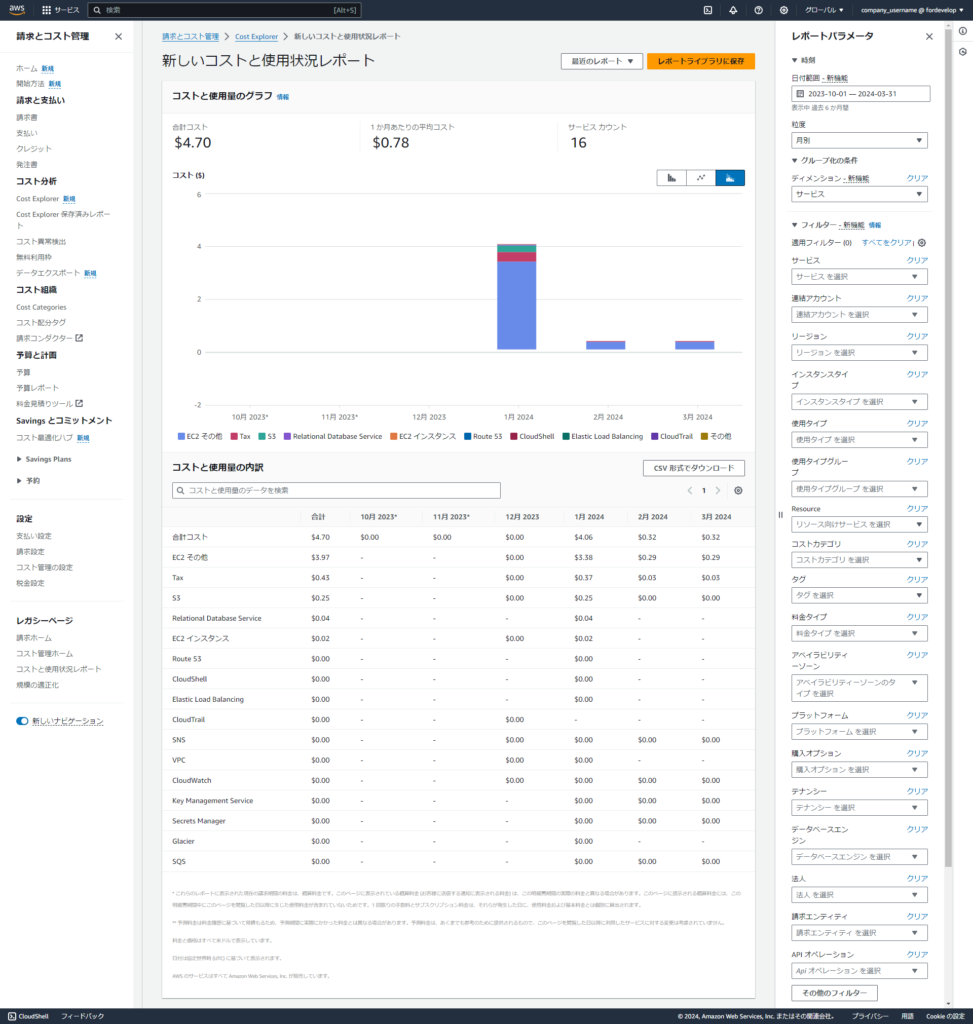
AWS Cost Explorer(以下画像)でAWS利用料を可視化し、AWS Cost Anomaly Detectionで異常検出します。
![](https://ootkblog.com/wp-content/uploads/2024/04/aws-cost-anomaly-detection-settings-1-973x1024.png)
AWS Cost Anomaly Detectionを設定する
「ご利用開始にあたって」をクリックします。
![](https://ootkblog.com/wp-content/uploads/2024/04/aws-cost-anomaly-detection-settings-2-1024x503.png)
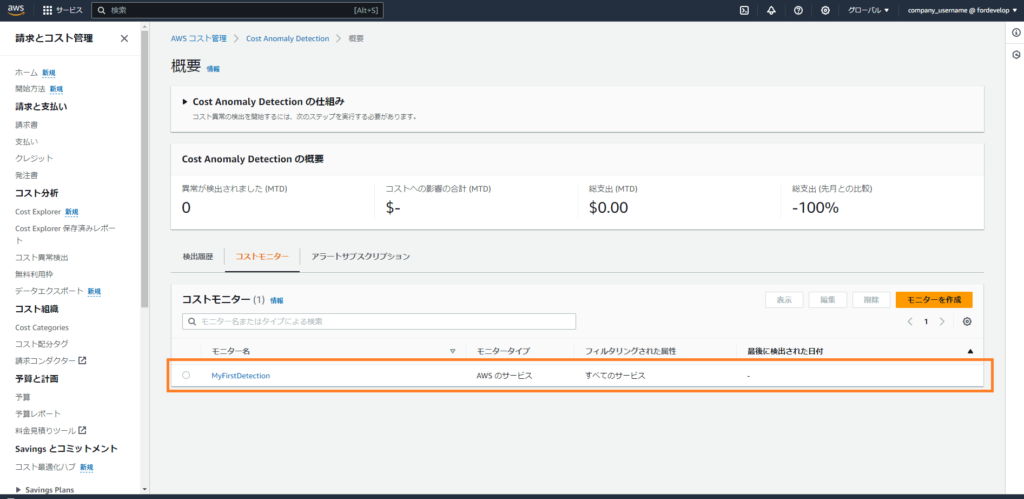
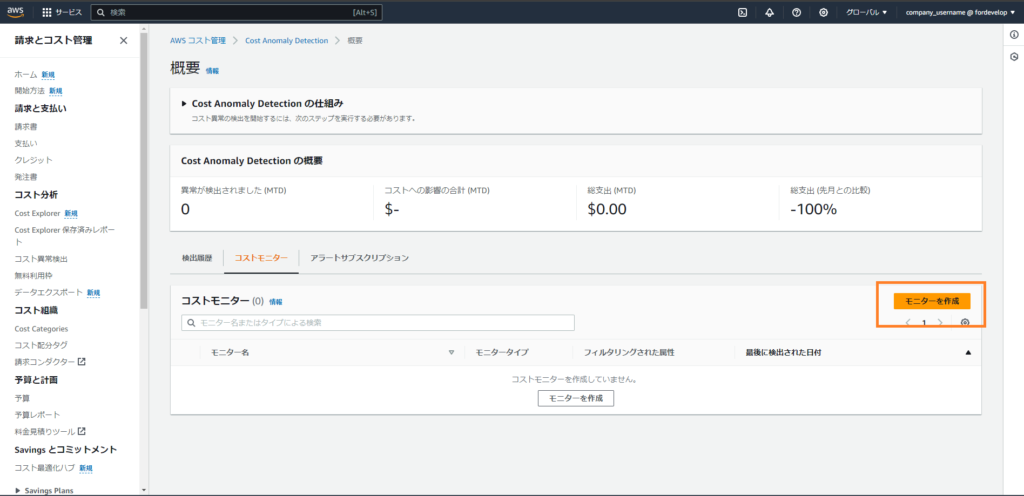
コストモニターで「モニターを作成」をクリックします。
![](https://ootkblog.com/wp-content/uploads/2024/04/aws-cost-anomaly-detection-settings-3-1024x496.png)
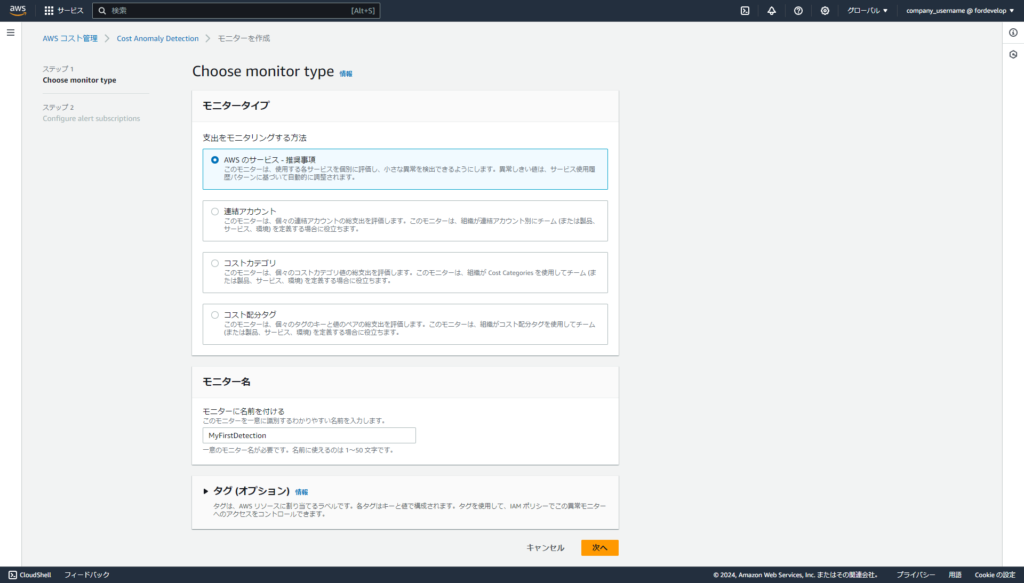
モニタータイプを設定します。今回は以下のように設定します。
- 支出をモニタリングする方法:AWSサービス
- モニター名:MyFirstDetection
![](https://ootkblog.com/wp-content/uploads/2024/04/aws-cost-anomaly-detection-settings-4-1024x583.png)
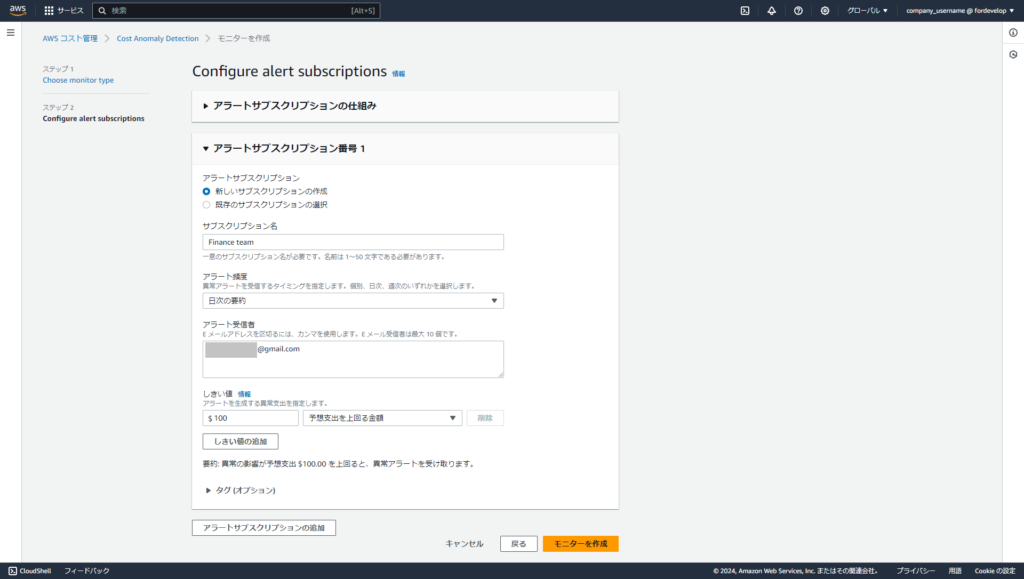
アラートサブスクリプションを設定します。以下のように設定します。
- アラートサブスクリプション:新しいサブスクリプションの作成
- サブスクリプション名:Finance team
- アラート頻度:日次の要約
- アラート受信者:〇〇〇@gmail.com
- しきい値:$100 予想支出を上回る金額
![](https://ootkblog.com/wp-content/uploads/2024/04/aws-cost-anomaly-detection-settings-5-1024x579.png)
これでAWS Cost Anomaly Detectionの設定完了です。
![](https://ootkblog.com/wp-content/uploads/2024/04/aws-cost-anomaly-detection-settings-6-1024x499.png)