Amazon EC2(Amazon Linux 2023)にNGINXをインストールする方法を解説します。
目次
Amazon EC2(Amazon Linux 2023)にNGINXをインストール
以下のコマンドを実行し、パッケージをアップデートします。
sudo dnf update
以下のコマンドを実行し、NGINXをインストールします。
sudo dnf install nginx
以下のコマンドを実行し、NGINXがインストールされたか確認します。
nginx -v
これで、Amazon EC2(Amazon Linux 2023)にNGINXをインストール完了です。
NGINXを起動してみる
以下のコマンドを実行し、NGINXを起動します。
sudo systemctl start nginx
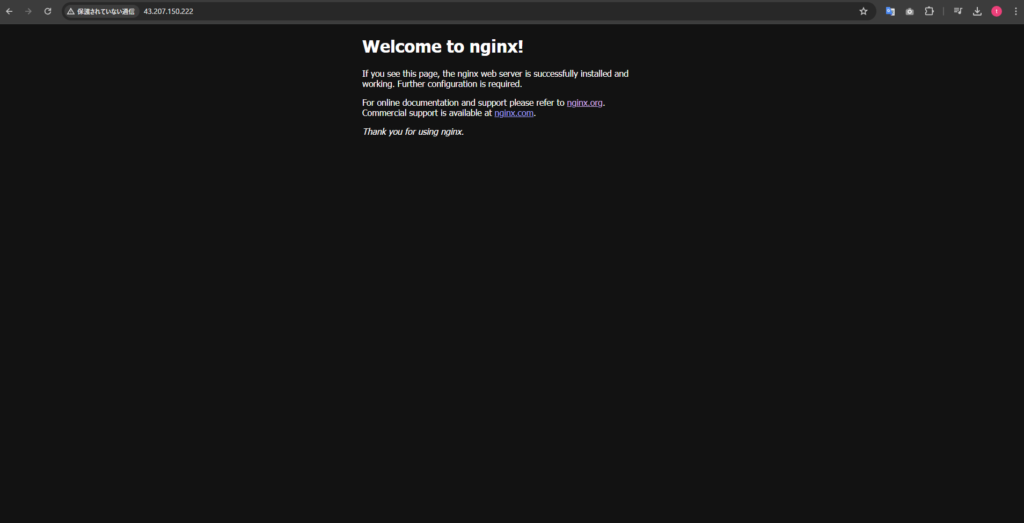
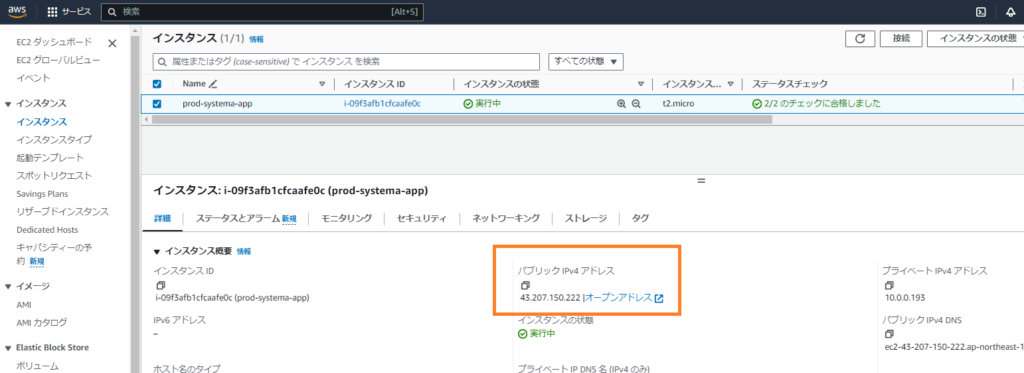
パブリックIPアドレスをコピーします。
ブラウザの検索窓にパブリックIPアドレスを貼り付け、検索します。
以下のような画面が表示されれば、NGINXは起動できています。