AWS コマンドラインインターフェイス(AWS CLI)のインストール方法と使い方を解説します。
コマンドラインインターフェイス(CLI)をインストールする
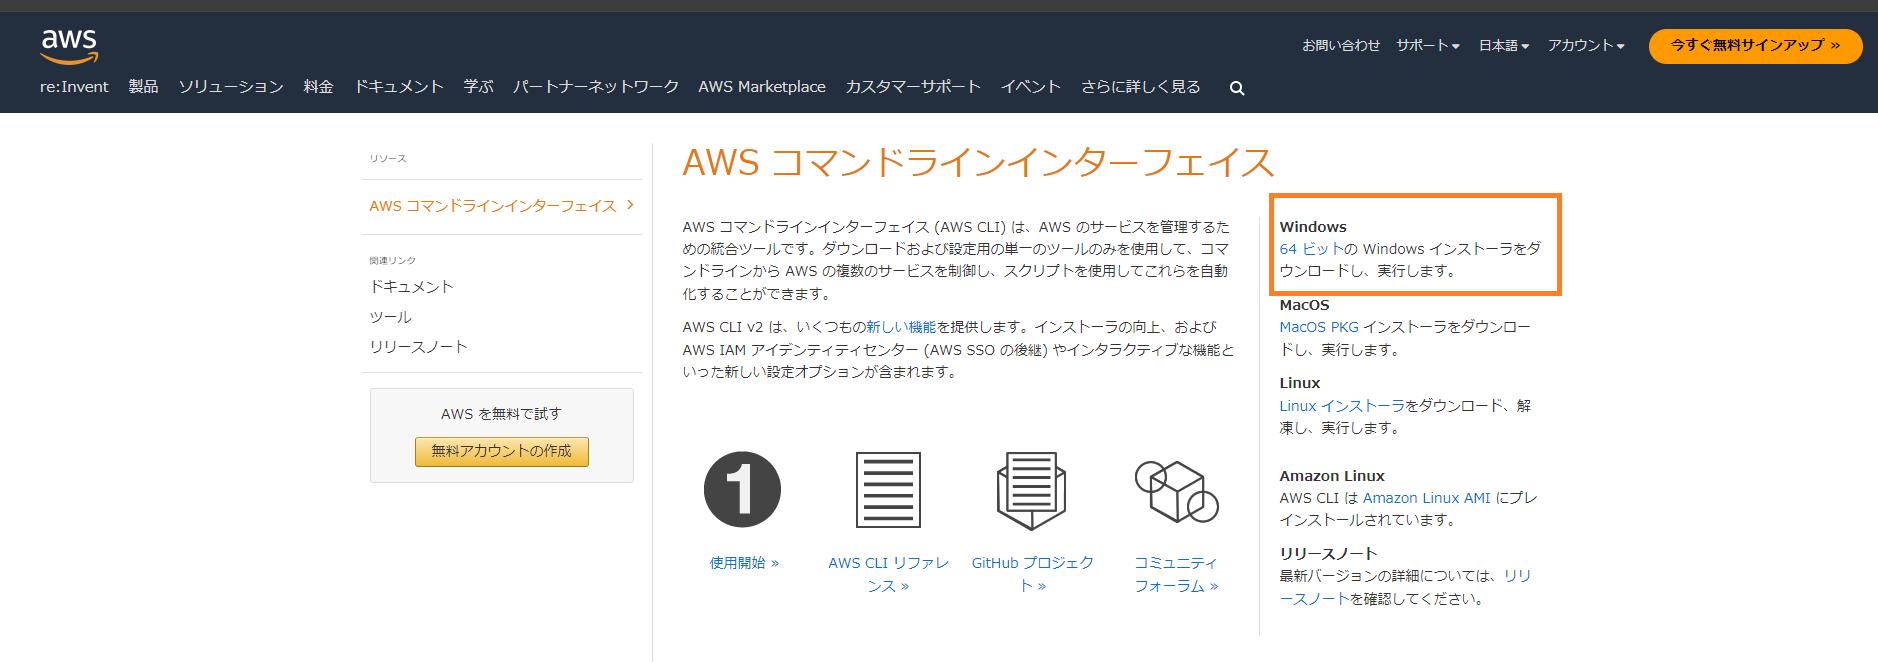
まず以下のサイトに移動します。
Windowsの「64ビット」をクリックすると、ダウンロードされます。

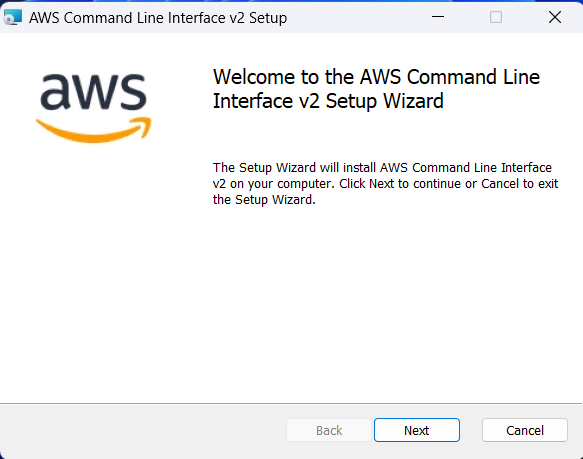
ダウンロードされたmsiファイルをダブルクリックして起動します。

「Next」をクリックします。
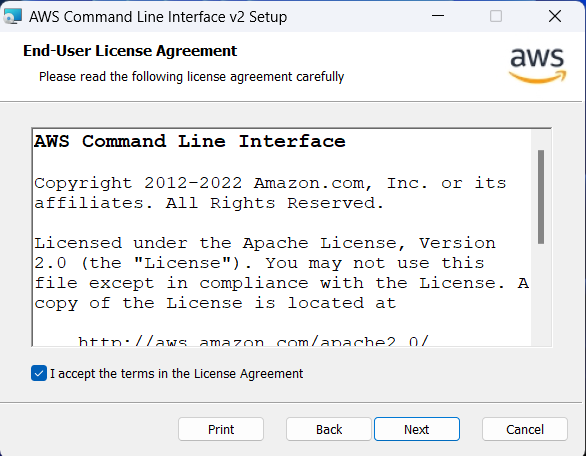
「I accept the terms in the License Agreement」にチェックを入れ、「Next」をクリックします。
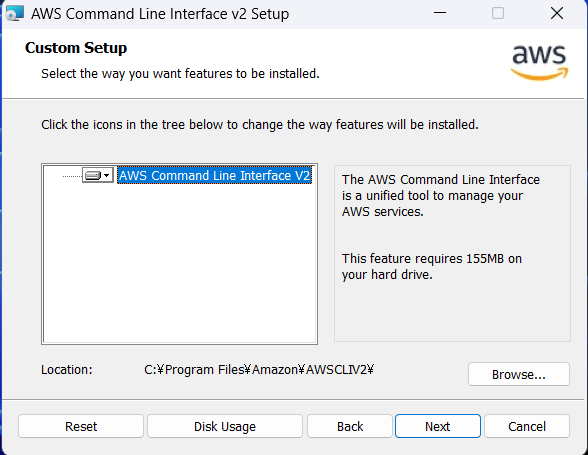
「Next」をクリックします。
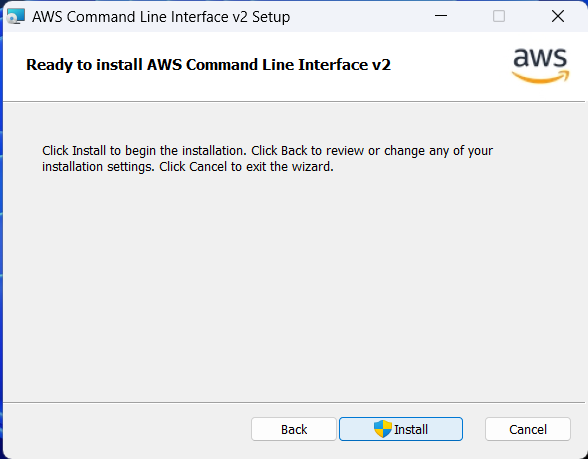
「Install」をクリックします。
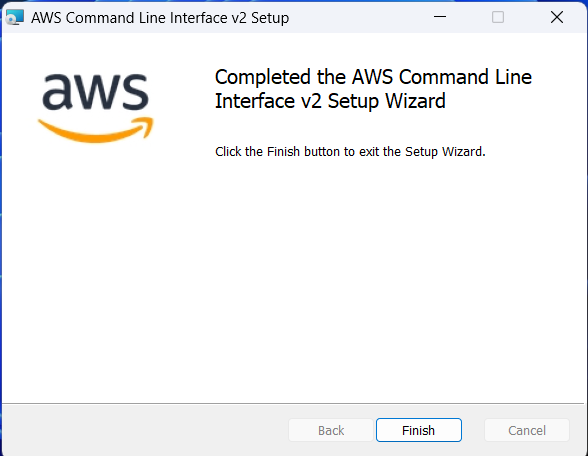
「Finish」をクリックします。
コマンドラインインターフェイス(CLI)を使えるようにする
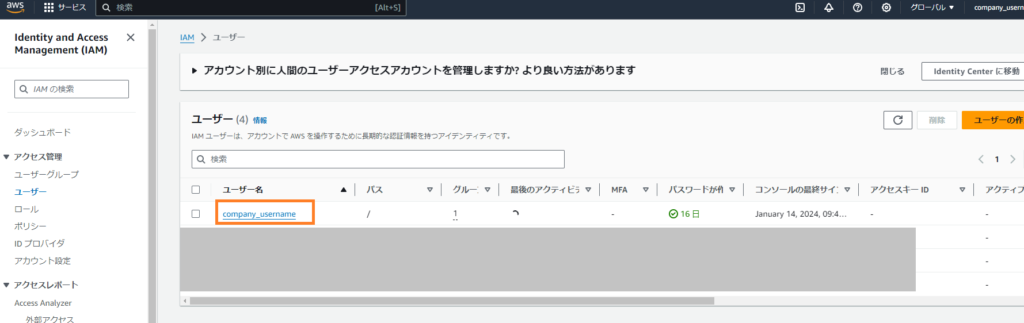
IAMユーザーに移動し、ユーザー名をクリックします。
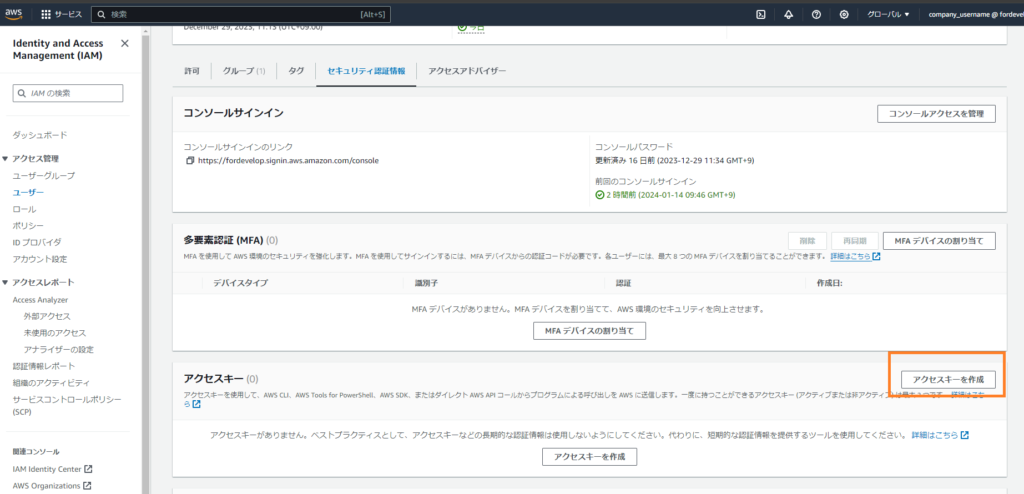
セキュリティ認証情報からアクセスキーの「アクセスキーを作成」をクリックします。
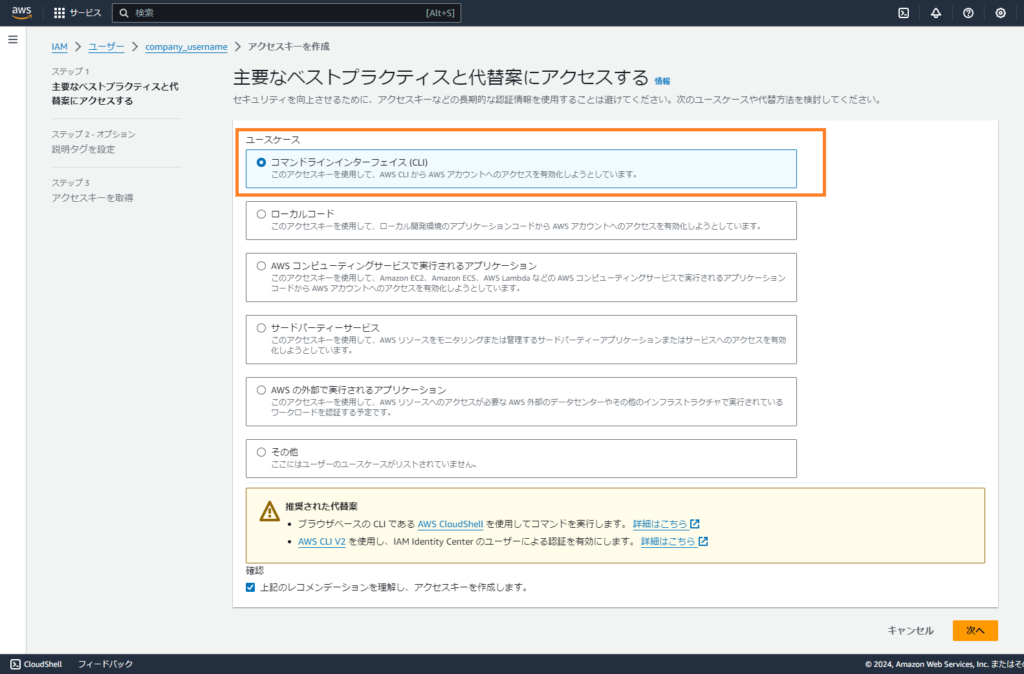
コマンドラインインターフェイス(CLI)を選択し、「次へ」をクリックします。
説明タグを設定し、「アクセスキーを作成」をクリックします。

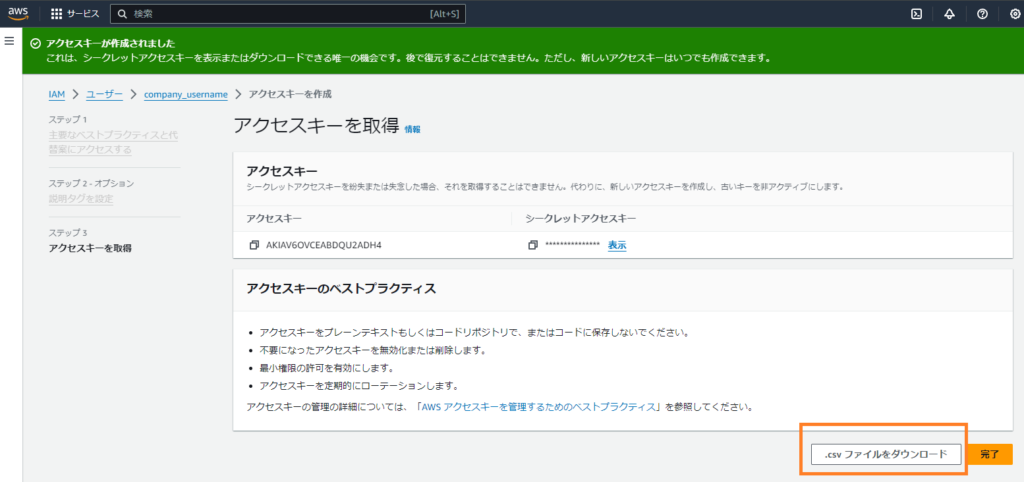
アクセスキーとシークレットアクセスキーが表示されます。
右下の「.csvファイルをダウンロード」をクリックし、アクセスキーとシークレットアクセスキーが記載された.csvファイルをダウンロードします。
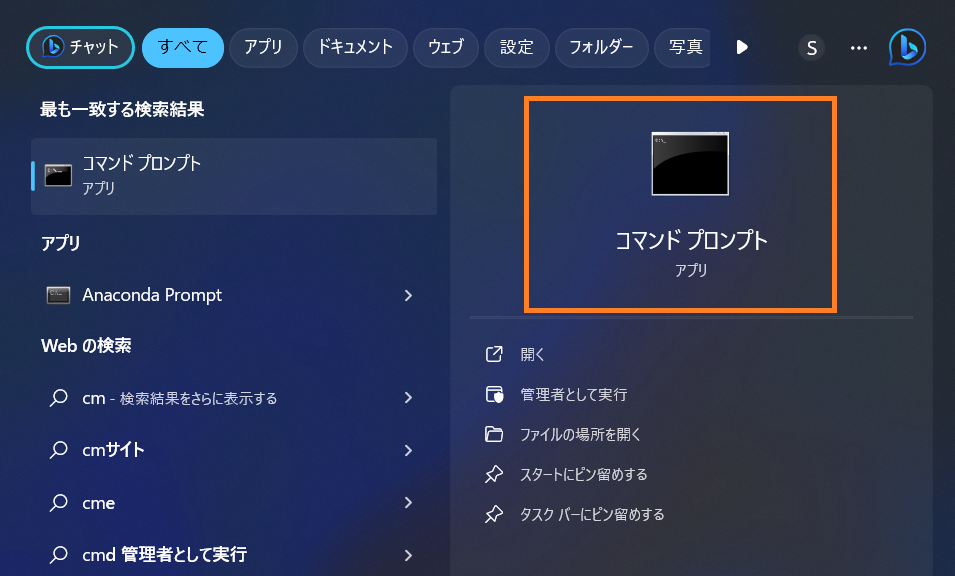
コマンドプロンプトを起動します。
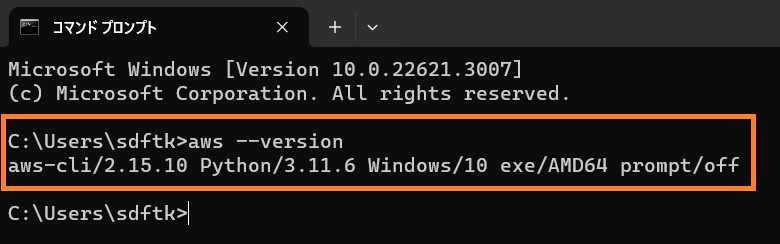
以下のコマンド
aws --versionを実行すると、CLIがインストールされているか確認できます。
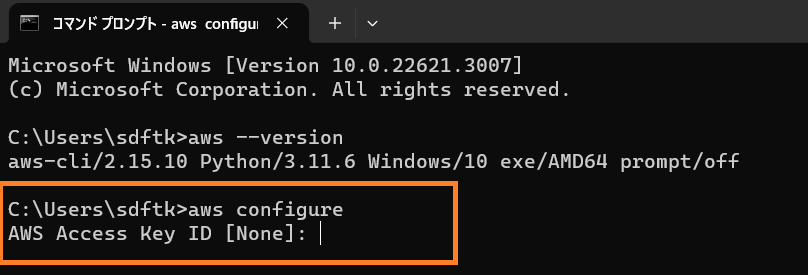
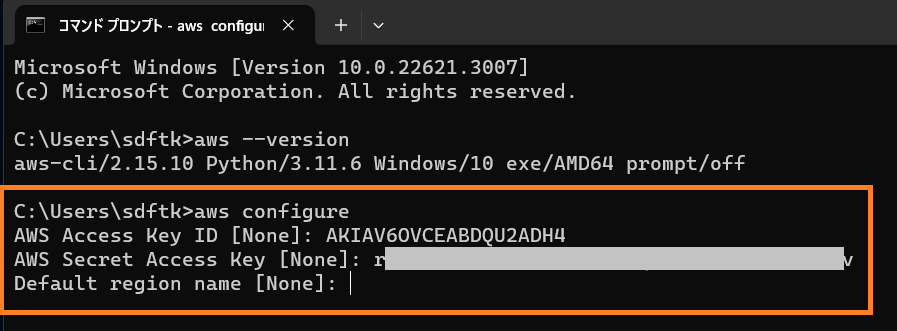
以下のコマンド
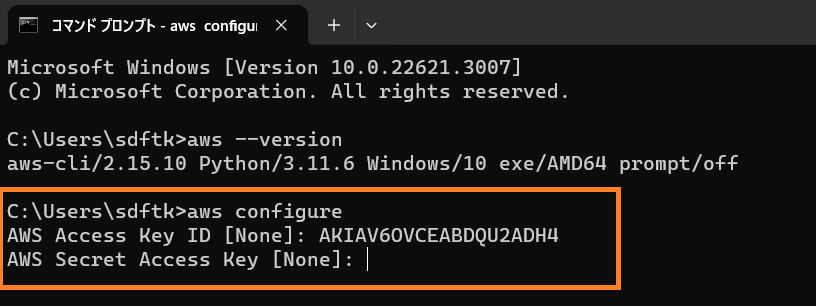
aws configureを実行すると、アクセスキーを求められるので入力します。
アクセスキーを入力し、Enterキーを押すと、シークレットアクセスキーを求められるので入力します。
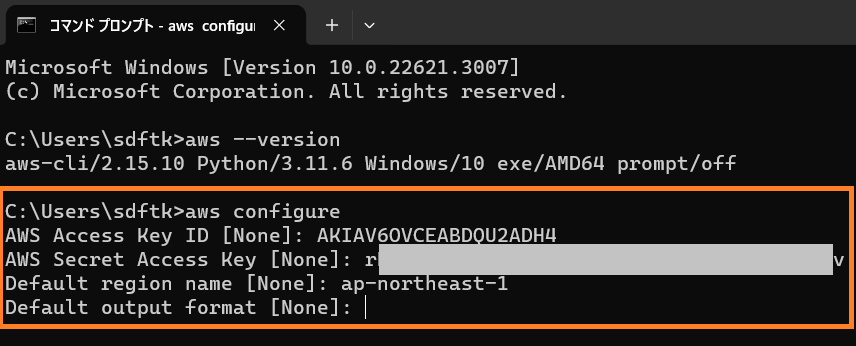
シークレットアクセスキーを入力し、Enterキーを押すと、デフォルトリージョン名を求められるので入力します。
今回は東京リージョンを設定するので、
ap-northeast-1と入力します。
デフォルトリージョン名を入力し、Enterキーを押すと、デフォルトアウトプット形式を求められるので入力します。
今回はjsonを設定するので、
jsonと入力します。
デフォルトアウトプット形式を入力し、Enterキーを押します。

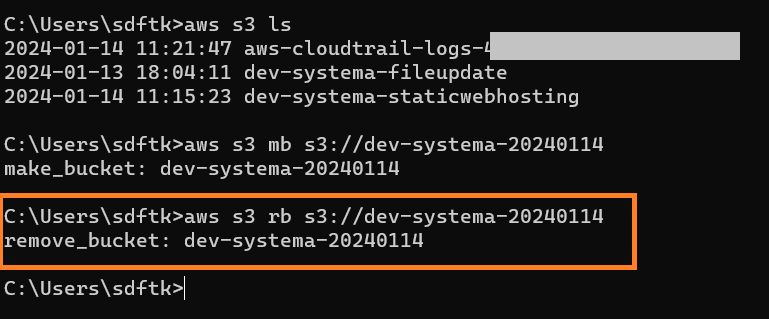
コマンドラインインターフェイス(CLI)でS3を操作してみる
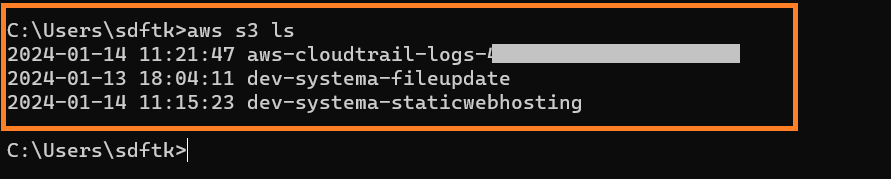
以下のコマンド
aws s3 lsを実行すると、すべてのS3バケットが表示されます。
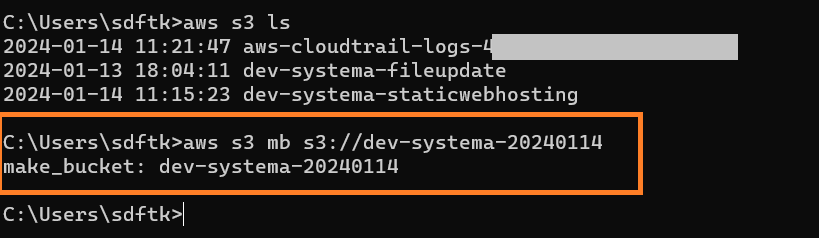
以下のコマンド
aws s3 mb s3://S3バケット名を実行すると、S3バケットが新規作成されます。
以下のコマンド
aws s3 rb s3://S3バケット名を実行すると、S3バケットが削除されます。
AWSの公式サイトにコマンドが記載されています。